Never share your user login details, as it grants full permissions to manipulate the server. Instead, utilize the subuser feature to grant controlled access.
Subusers will receive two emails: one titled "Account Created" and the other "Added To Server". They should first set up their account using the "Account Created" email, followed by accessing the "Added To Server" email. If the subuser already has an account, they won't receive the "Account Created" email; instead, they should use their existing password to access the panel. Subusers can reset their password if needed.
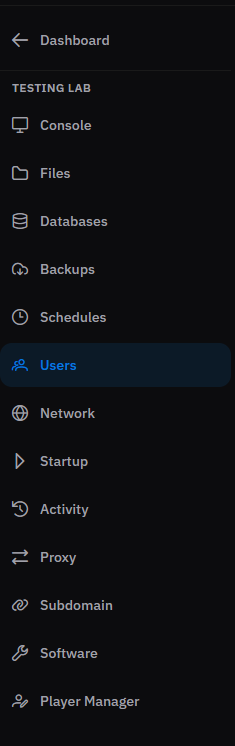
1. Go to the server where you want to add a subuser and navigate to the "Users" section on the left-hand side.
2. Click the "Invite" button to create a new user, prompting a window to appear on the website.
3. Provide the user's email address in the designated field.
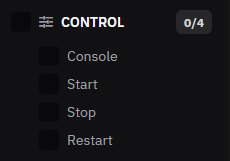
These permissions allow the user to control the server power options.
Console: Allows the user to view and send commands in the console.
Start: Allows the user to start the server.
Stop: Allows the user to stop the server.
Restart: Allows the user to restart the server.
Only give console access to users you trust, because console commands can affect the whole server.
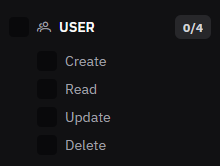
These permissions allow the user to manage other subusers.
Create: Allows the user to invite new subusers.
Read: Allows the user to view existing subusers.
Update: Allows the user to edit subuser permissions.
Delete: Allows the user to remove subusers.
Be careful with these permissions, as they allow the user to manage access for other people.
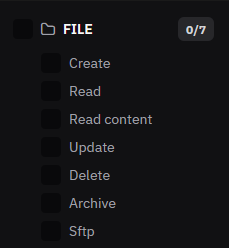
These permissions control access to the server files.
Create: Allows the user to create files and folders.
Read: Allows the user to view files and folders.
Read Content: Allows the user to open and view file contents.
Update: Allows the user to edit files.
Delete: Allows the user to delete files.
Archive: Allows the user to zip or unzip files.
SFTP: Allows the user to access files through SFTP.
Give file permissions only to people who need to edit plugins, configs, worlds, or server files.
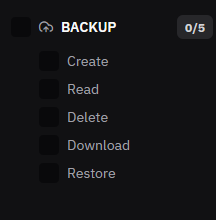
These permissions allow the user to manage server backups.
Create: Allows the user to create backups.
Read: Allows the user to view existing backups.
Delete: Allows the user to delete backups.
Download: Allows the user to download backups.
Restore: Allows the user to restore backups.
Be careful with restore and delete permissions, as they can affect your server data.
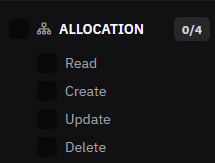
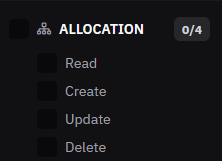
These permissions control server network allocations and ports.
Read: Allows the user to view server allocations.
Create: Allows the user to add allocations.
Update: Allows the user to edit the primary allocation or notes.
Delete: Allows the user to remove allocations.
These permissions are usually only needed for advanced server setup.
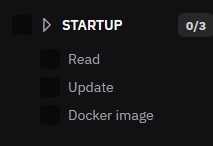
These permissions control startup settings.
Read: Allows the user to view startup variables.
Update: Allows the user to edit startup variables.
Docker Image: Allows the user to change the server Docker image.
Only give these permissions to trusted users, as incorrect startup settings may stop the server from working.
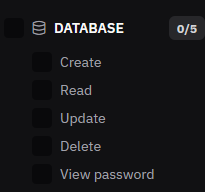
These permissions allow the user to manage server databases.
Create: Allows the user to create databases.
Read: Allows the user to view databases.
Update: Allows the user to rotate or update database access.
Delete: Allows the user to delete databases.
View Password: Allows the user to view database passwords.
Database passwords should only be visible to trusted users.
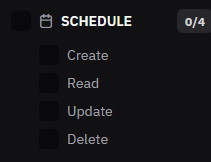
These permissions control automated server schedules.
Create: Allows the user to create schedules.
Read: Allows the user to view schedules.
Update: Allows the user to edit schedules.
Delete: Allows the user to delete schedules.
Schedules are commonly used for automatic restarts, backups, or commands.
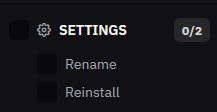
These permissions allow the user to change basic server settings.
Rename: Allows the user to rename the server.
Reinstall: Allows the user to reinstall the server.
Be careful with reinstall permission, as reinstalling may remove or reset server files depending on the setup.
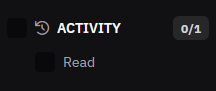
Read: Allows the user to view activity logs.
Activity logs are useful for checking what actions were performed on the server.
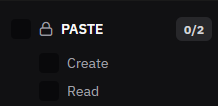
These permissions allow the user to use paste features.
Create: Allows the user to create pastes.
Read: Allows the user to view pastes.
This is mainly useful for sharing logs or console output.
You can click Select All if you want to give the user every permission.
Only use this option for people you fully trust, because it gives them complete access to manage the server.
Once you click Invite, the user will receive an email invitation.
If they already have an account, they can accept the invite and access the server based on the permissions you selected.
If they do not have an account yet, they will need to create one first before they can be invited.
For normal staff members:
Console
Start
Stop
Restart
File Read
File Read Content
File Update
Activity Read
For developers:
Console
Start
Stop
Restart
File permissions
Backup Create
Backup Read
Startup Read
Startup Update
Database Read
For trusted admins:
Control permissions
User permissions
File permissions
Backup permissions
Database permissions
Schedule permissions
Settings permissions
Activity Read

Updated on: 28/06/2026