
Minecraft Server Management - The Basics
This article aims to teach the basics of running a Minecraft server on WitherHosting! Please note that this article is longer than our others and is continuously updated, so some details may be missing. Let's dive in!
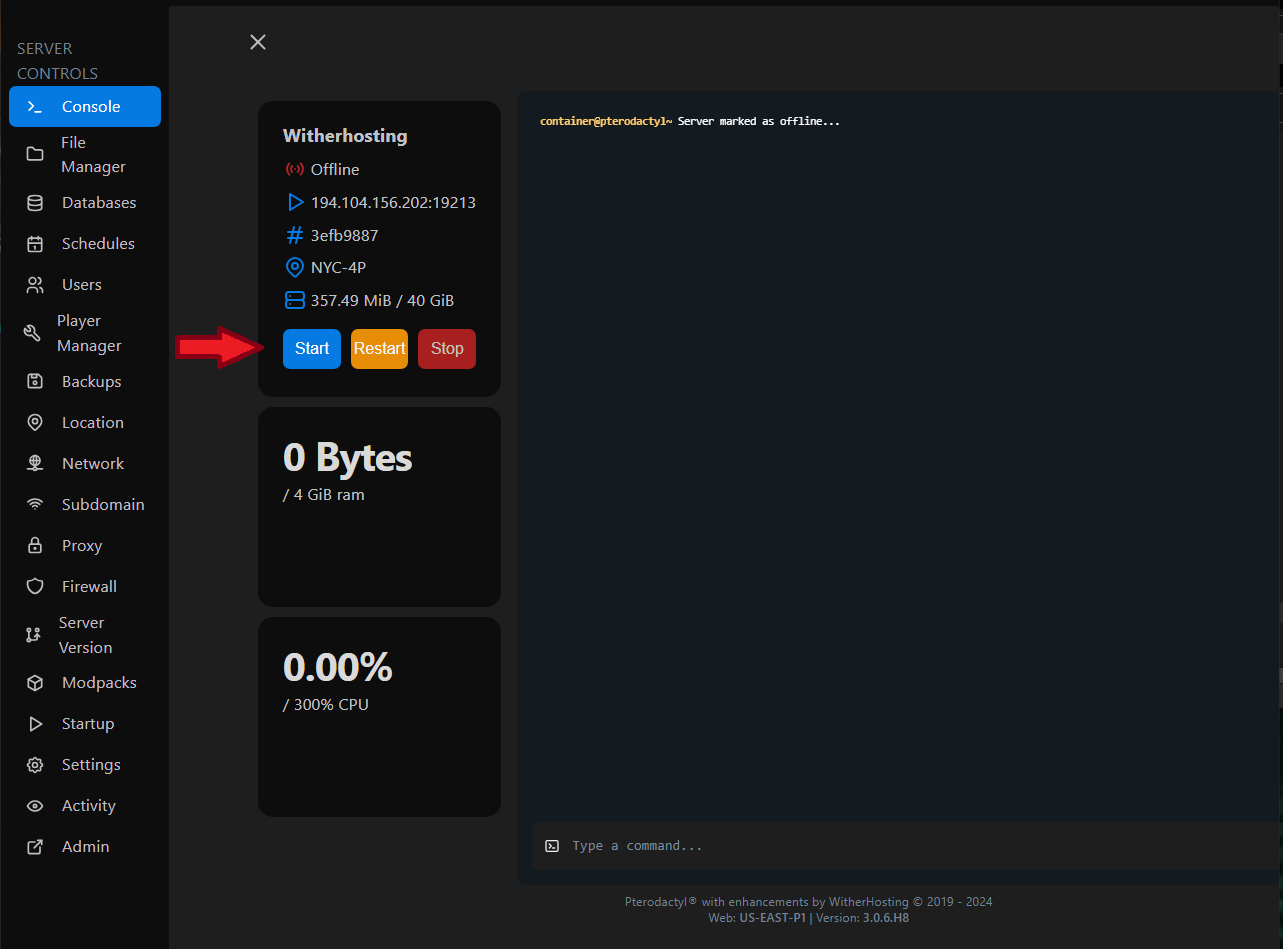
🏎️ Starting Your Server 🏎️
To start your server, go to WitherPanel, select your server, and click the "Start" button as shown below:
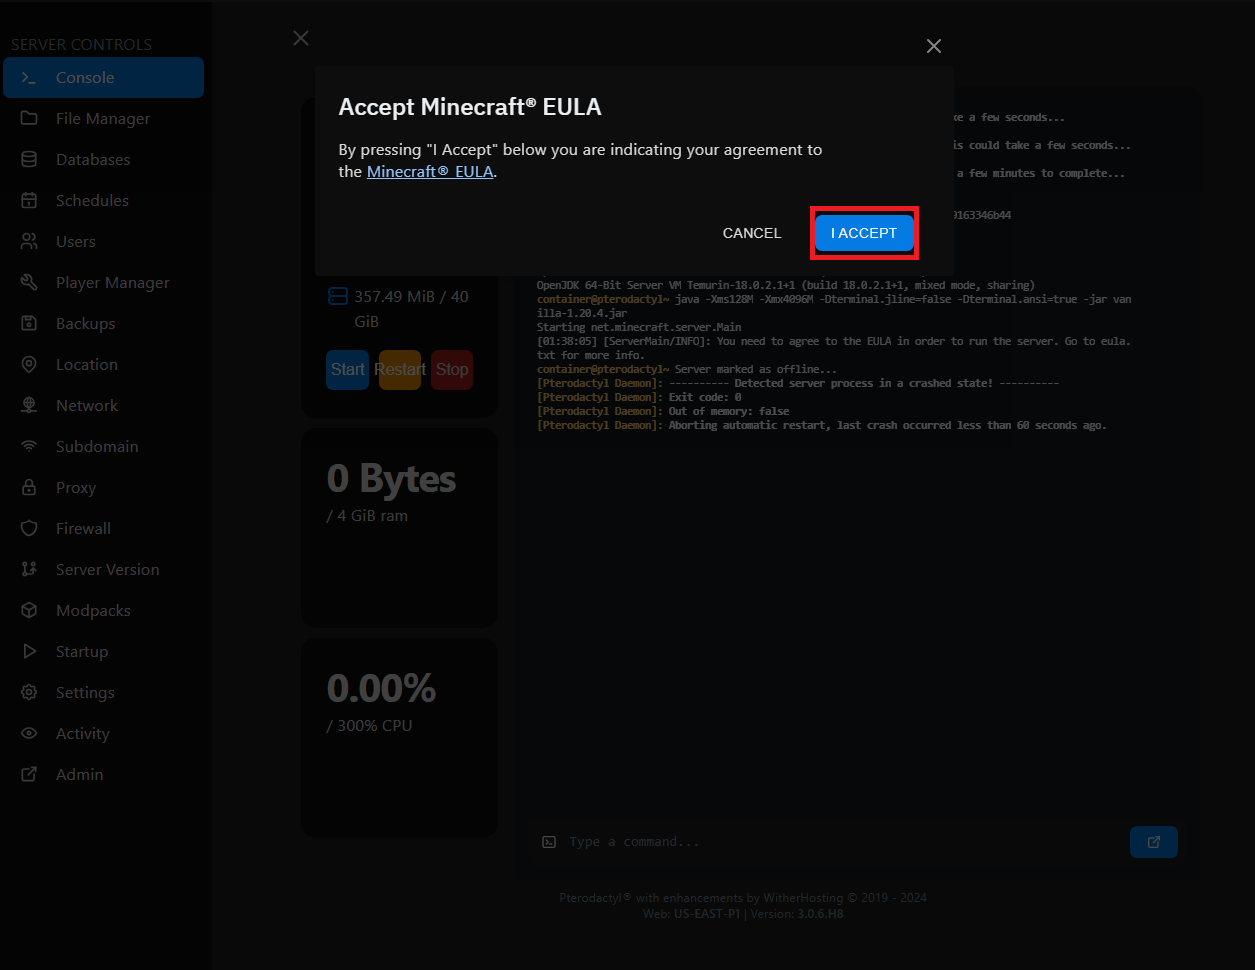
On the first run, the panel will display a message asking you to agree to the Minecraft EULA, which outlines the requirements you need to follow to run your Minecraft server. The panel provides a link, but you can find the EULA here: https://account.mojang.com/documents/minecraft_eula
If you agree, click the blue "Agree" button.
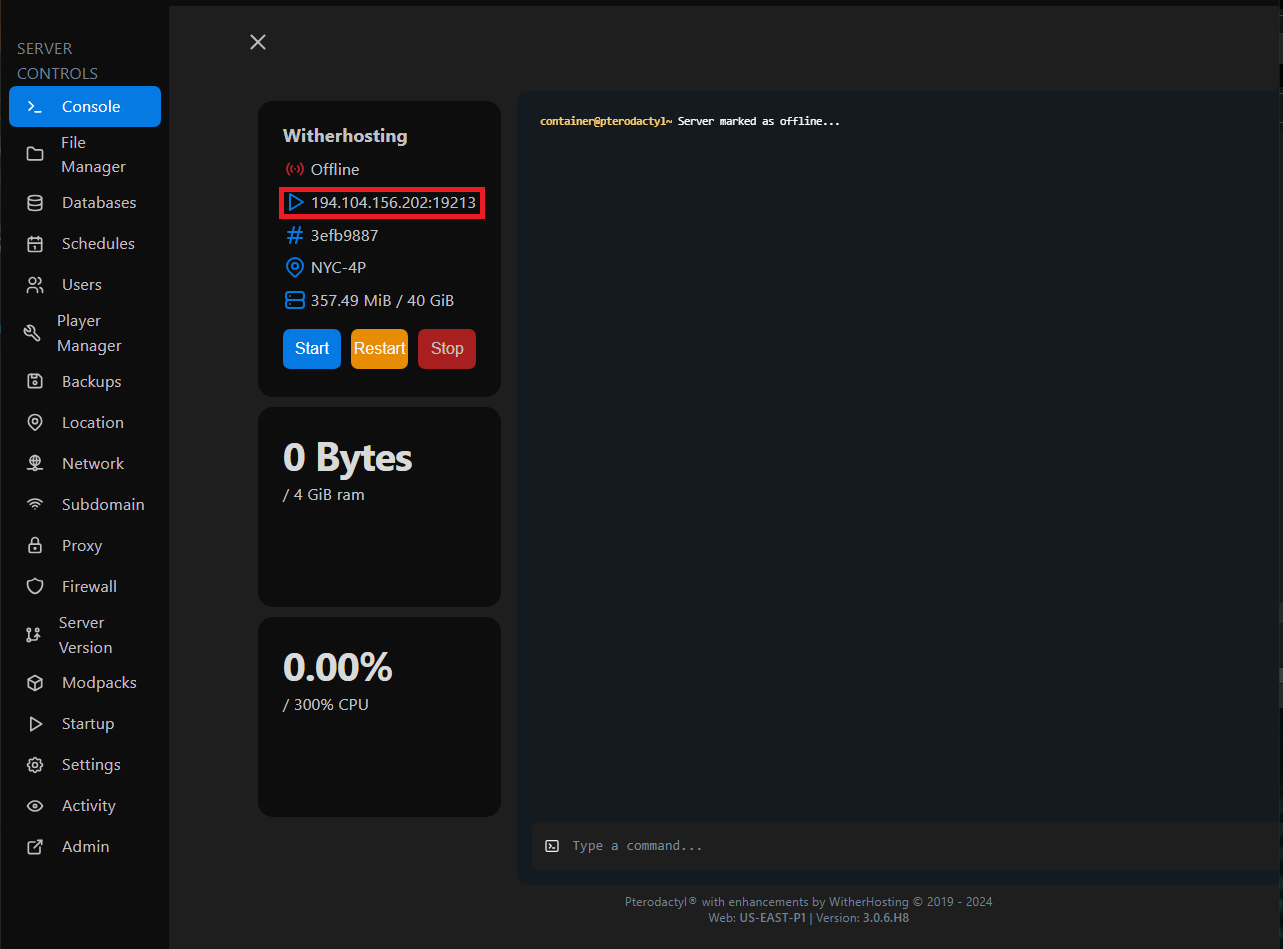
🚪 How to Join Your Server 🚪
You can find the IP address and port in the Information box next to the server console.
Connecting with the IP and port (Java edition):
Copy the IP and Port to your clipboard (click on it to copy), then paste it into your client like this:

Connecting with the IP and port (Bedrock edition):
Copy the IP and Port to your clipboard (click on it to copy), then paste it into your client like this:

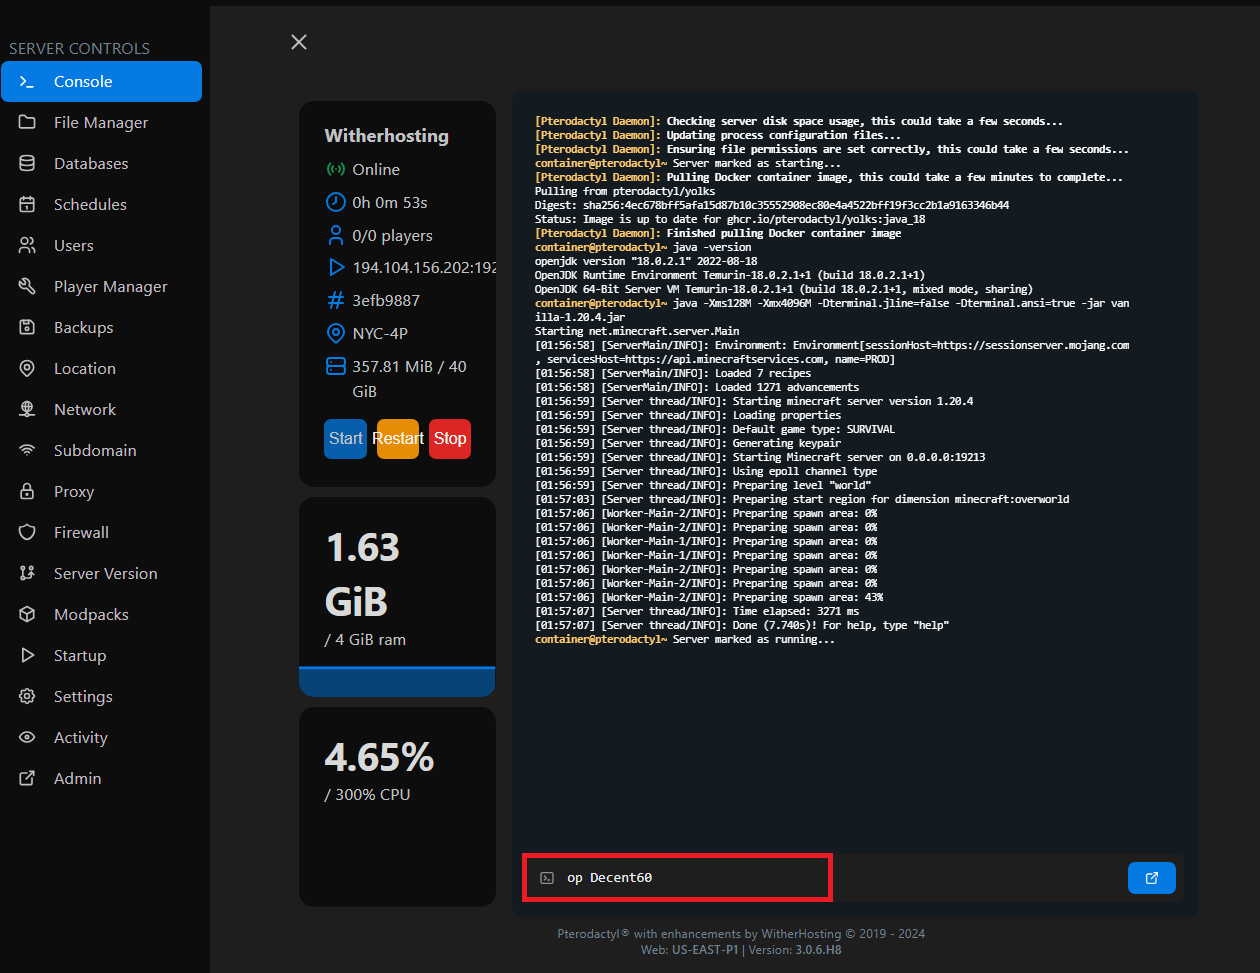
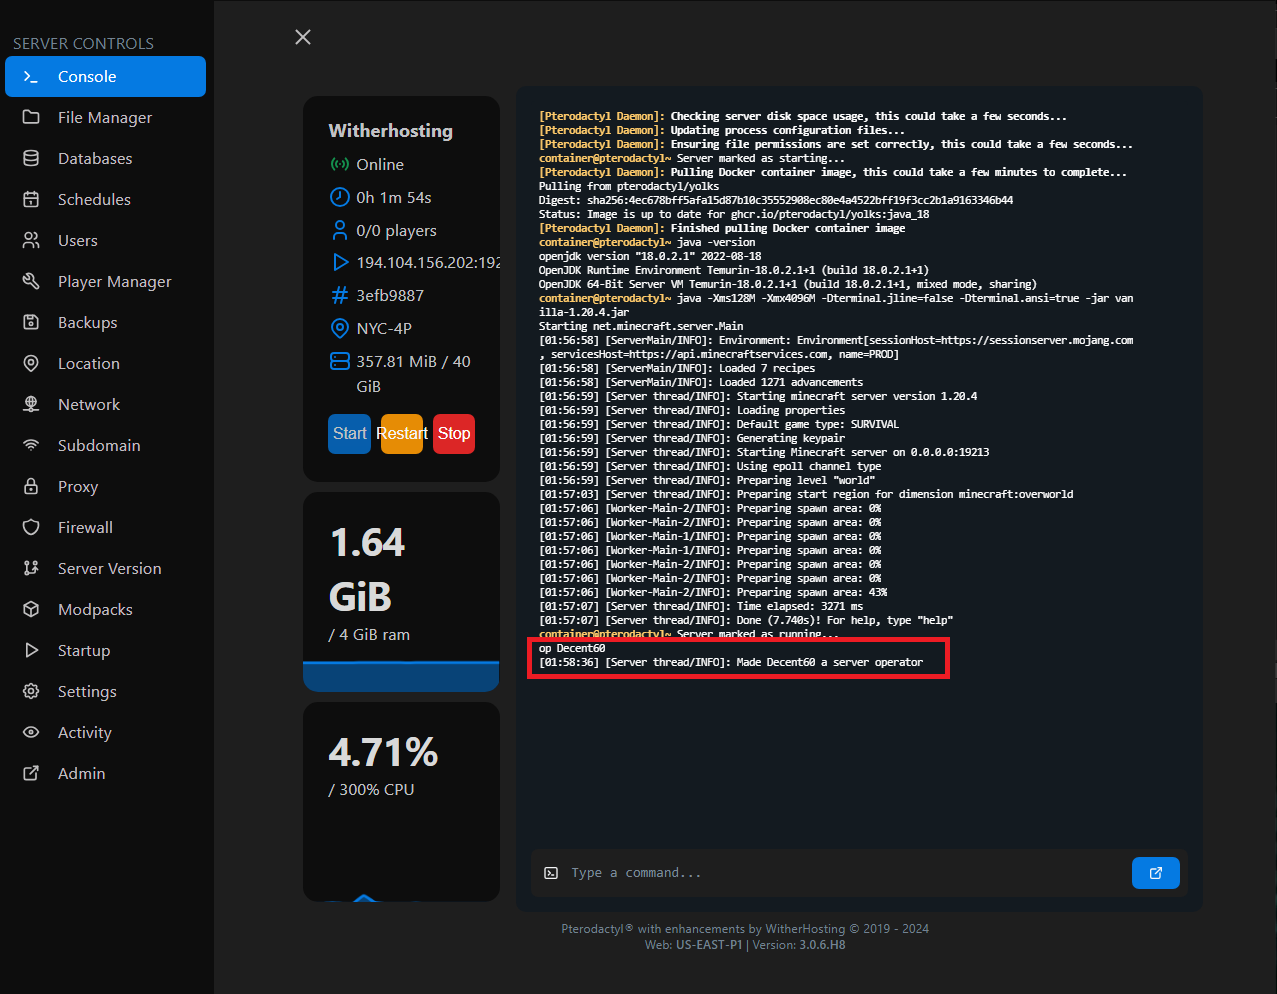
👮 Gaining Admin Permissions on Your Server 👮
To gain admin "OP" permissions, go to your server console and type op <username>, replacing <username> with the user you wish to OP. Then press Enter.
For example:
then press Enter:
📃 Setting Up a Whitelist 📃
To set up a whitelist, go to your server.properties file and set whitelist=true. In some cases, it may be a number. 0 is false, 1 is true. Once done, restart your server. You can also activate it by running the command whitelist on in the console.

You can then add usernames by running the command whitelist add <username>, replacing <username> with the name of the player you want to whitelist.

To un-whitelist players, run the command whitelist remove <username>, replacing <username> with the name of the player you want to un-whitelist.

whitelist list!🖼️ Adding a Server Icon 🖼️
To add a server icon, upload an image with the exact dimensions of 64x64 pixels to the /home/container directory in your file manager.
You can open your image in the Paint 3D app, go to the canvas settings, enable "resize image with canvas," and set the width and height to 64 pixels to ensure the icon is the correct size!

Once done, upload the file to the /home/container directory, rename it to server-icon.png, and save. Restart your server, and the icon will load in!

🔌 Adding Plugins 🔌
Follow our guide to add plugins based on your server software! If you want to compile your own plugins, see this guide
📦 Adding Packs 📦
Based on the type of pack you want to add, you can follow these guides:
- Resource packs (Java & Bedrock) - Guide
- Data packs (Java) - Guide
- Behaviour packs (Java & Bedrock) - Guide
- Mods/Modpacks - Requires Forge Enhanced as your selected server software - Guide
💬 Vanilla Commands 💬
To learn about all the available commands you can use, check out our guide
Updated on: 02/06/2024
Thank you!